Wednesday, July 14, 2021

Epoxy or Polyurea Floor Experts Share Tips You Can Use For Your Floor

Epoxy or Polyurea Floor Cleaning Tips You Can Use

Epoxy and polyurea floor coatings are an aesthetically pleasing solution to garage and warehouse incidents that could potentially damage an uncoated floor. Your floor becomes able to withstand harsh impacts, bear heavier loads, and resist stains when treated with one of these coatings. How easy the coatings are to maintain is one of their most prominent features. 

Because of their durability, both epoxy and polyurea coatings diminish the need for repair and clean-up, but that doesn’t mean they’re immune! Below you’ll be provided with several tips to keep your concrete floor coating looking as good as new.

Epoxy or Polyurea

Grab the Right Tools

One of the most critical steps for any job is having the right tools on hand, and cleaning epoxy and polyurea floors are no different. You won’t need any heavy-duty cleaning products for this job, and these products aren’t recommended because they can damage the coating. A soft-bristled broom or microfiber mop can handle most of the clean-up; even a soft towel or paper cloth will suffice for smaller spills or dust build-up.

Avoid Dragging Heavy Equipment

Concrete floor coating is highly resistant to damage and can withstand heavier loads, but this can wear on the coating over time. It’s recommended that you avoid dragging heavy equipment across your flooring to prevent scuffs and scrapes. If a heavy load needs to be moved or stored somewhere, make sure that protective cloth or padding is underneath it so that sharp edges don’t pierce the coating.

Don’t Let Debris Build-Up

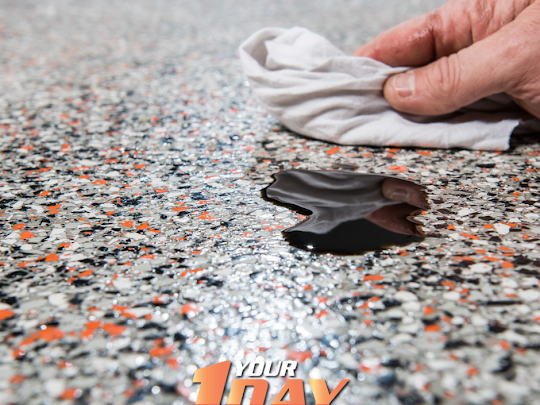
A thick build-up of dust or debris can wear down a coating of epoxy or polyurea and make them less effective overall. Spilled liquids, such as oil or antifreeze, will eventually eat through the coating as well. 

Frequently spot cleaning your floor will allow you to keep ahead of the general messes. However, for heavy stains or caked-on grime, it’s good to set aside a day where you do a comprehensive, front-to-back cleaning so that your coating can keep that glossy shine.

Avoid Acidic Cleaners

While floor coatings are meant to be more resilient than regular concrete, there are a few cleaning substances that you should avoid bringing into contact with them. Any solution containing bleach, hydrochloric acid, or citric acid can eat away at an epoxy coating and should be avoided. Polyurea coatings are more resistant to harsh chemicals, but it’s best to exercise caution with polyurea as well. 

A simple mixture of ammonia and water should work for most stains.

Call a Professional

Though cleaning concrete floor coatings is a simple process for most buyers, don’t hesitate to call in a professional if you think it’s best. If there’s a stain that won’t come off with your usual cleaning methods or a scratch in the coating you’re unsure how to patch, you can trust that a professional contractor will have the answer. Get in touch with Your1DayFloor in Dayton, OH at (833) 969-1329 or via the website for a fast quote on concrete floor coating services.


source https://clearcutgroup.ca/press-releases/epoxy-or-polyurea-floor-experts-share-tips-you-can-use-for-your-floor/

Clear Cut Group Provides a DIY Guide To Your Next Sod Installation Project

Useful Tips for Sod Installation You Could Use

The pride of many homeowners and parks has been a lush lawn that looks vibrant, healthy, and thick. No surprise then, sod continues to be the number one way to install and produce an even lawn right from the start versus trying to grow it from seed. However, laying new sod isn’t a simple matter of unrolling carpet slices of green grass. A good amount of preparation is involved in the job to do it right, otherwise, the sod applied can end up dying off.

How Much Sod to Order?

A typical sod application is not a drop in the bucket. A 1,000 square foot section will run approximately $850, and larger yards or front lawn areas can cost more. However, the positive effects can be almost immediate as it only takes a few weeks for the sod to settle in and look like a natural lawn without any hint of artificial preparation and installation.

Sod Installation

When to Lay Sod

The best time for a new sod installation tends to be in the spring or fall. Ideally, the sod should go down when it is cool outside and there’s no blazing sun or frigid temperatures at night. Technically, sod can be installed any time of year without snow or freezing, but it will grow best in the mid-warming times of year between extremes.

How to Prepare for Sod Installation

The first step in how to lay sod yourself and any sod job involves getting the soil ready for the sod installation. Sod can’t be just laid on top of hard-packed dirt and expected to magically grow. The soil underneath has to be tilled and turned over to all for oxygen, water penetration, and root growth. Sometimes soil may even have clay in it, a serious problem for growth. So, additional soil has to be added to break up this problem and give the sod proper material to work with. The most common soil preparation involves rototilling to a fine level so the ground is completely worked and there are no hardpan or compacted areas left.

Preparing Yard for Sod

Next, the soil has to be leveled when preparing for sod installation. Note, this does not mean compacted. Instead, the bumps and lumps need to be taken out or broken down so the sod has even contact with the soil underneath. Lumps and clods will create gaps and root die-off since the sod roots won’t be able to cross the spacing in a pocket. Close contact is ideal as the sod roots will continue to grow down into the soil bed, rooting the sod layer for long-term growth.

How Can You Lay Sod Pieces?

The first row of sod matters the most. You want that first row to be as straight as possible, so it should be lined up with an edge, a fence, or a sidewalk edge. That definition will impact the rest of the sod as it gets placed. The sod is basically placed, pinned, and unrolled along the edge. Generally, nothing should be on the sod or standing on it. A key factor is a sod, flat application without any pockets or bubbles. Use a rake if needed to press bumps or wrinkles down.

As a roll finishes and a new roll starts, they should be staggered so there’s not a single line across the lawn from one row to the next. A basic garden knife helps with trimming edges, ends, and holes for garden sprinklers and edges.

As the sod is laid down, one layer after another, tuck and butt the edges and ends together snugly so there’s no gapping or overlap. Ideally, the edges should grow together without any die-off due to a dry spot.

Watering

Adding water to the sod should be regular and frequent but avoid flooding and make sure drainage is working properly. Sitting water causes sod to rot and die off. Avoid standing on the lawn in any situation as it will be very easy to kill at this point in the growth. Watering should be in the morning so it has the day to dry off the excess and won’t sit at night. After about a week, watering can be lessened to every two days. By the third week, it should be two out of seven days. Then the sod should be in maintenance mode, with more water in the summer and less in the winter.

Time to Mow and How to Care for Sod

Generally, sod will not be ready to cut and mow for a number of weeks. It really shouldn’t even be touched until the grass is over three inches in height. At that point, lower it only to two inches. A lightweight mower should be used and all cuttings should be bagged and removed. The sod is still fragile and easy to kill off. Also, make sure the mower’s blade is sharpened; a dull blade bruises the grass and damages it further down the stalk.

Also, don’t be too quick to add fertilizer. The first feeding should be at least a month after the sod installation and not sooner. Make sure to use a starter fertilizer first versus a regular brand.

Can You Lay Down Sod by Yourself?

The short answer is yes, but you need to be dedicated to the work and have the right tools for the job. It’s not rocket science, but you can’t rush the job either for the best results. Putting down sod is not an instant-gratification trick; it takes work and planning. Follow the steps right, and the sod will turn into a beautiful lawn.

However, if this kind of project seems challenging or could take too much time, Clear Cut Group is always available to help.

Sod installation is just one of a number of projects Clear Cut Group can help homeowners with, along with landscaping and light hanging too. So, you can still enjoy a new sod installation without struggling with the work the first time, and it gives you a good chance to see how the job is done right as well.


source https://clearcutgroup.ca/press-releases/clear-cut-group-provides-a-diy-guide-to-your-next-sod-installation-project/

Epoxy or Polyurea Floor Experts Share Tips You Can Use For Your Floor

Epoxy or Polyurea Floor Cleaning Tips You Can Use Epoxy and polyurea floor coatings are an aesthetically pleasing solution to garage and wa...